This will walk you through setting up SSO using SAML using Azure Entra ID. The overall process is quite easy, and integrates well with SCIM for user and group provisioning.
Requires network admin permissions with the organization
Open the Azure Portal, and navigate to your Entra ID. Click on Enterprise applications, and then New application.

Click on Create your own application, name it Drip7, and choose Integrate any other application you don’t find in the gallery. Hit Create.

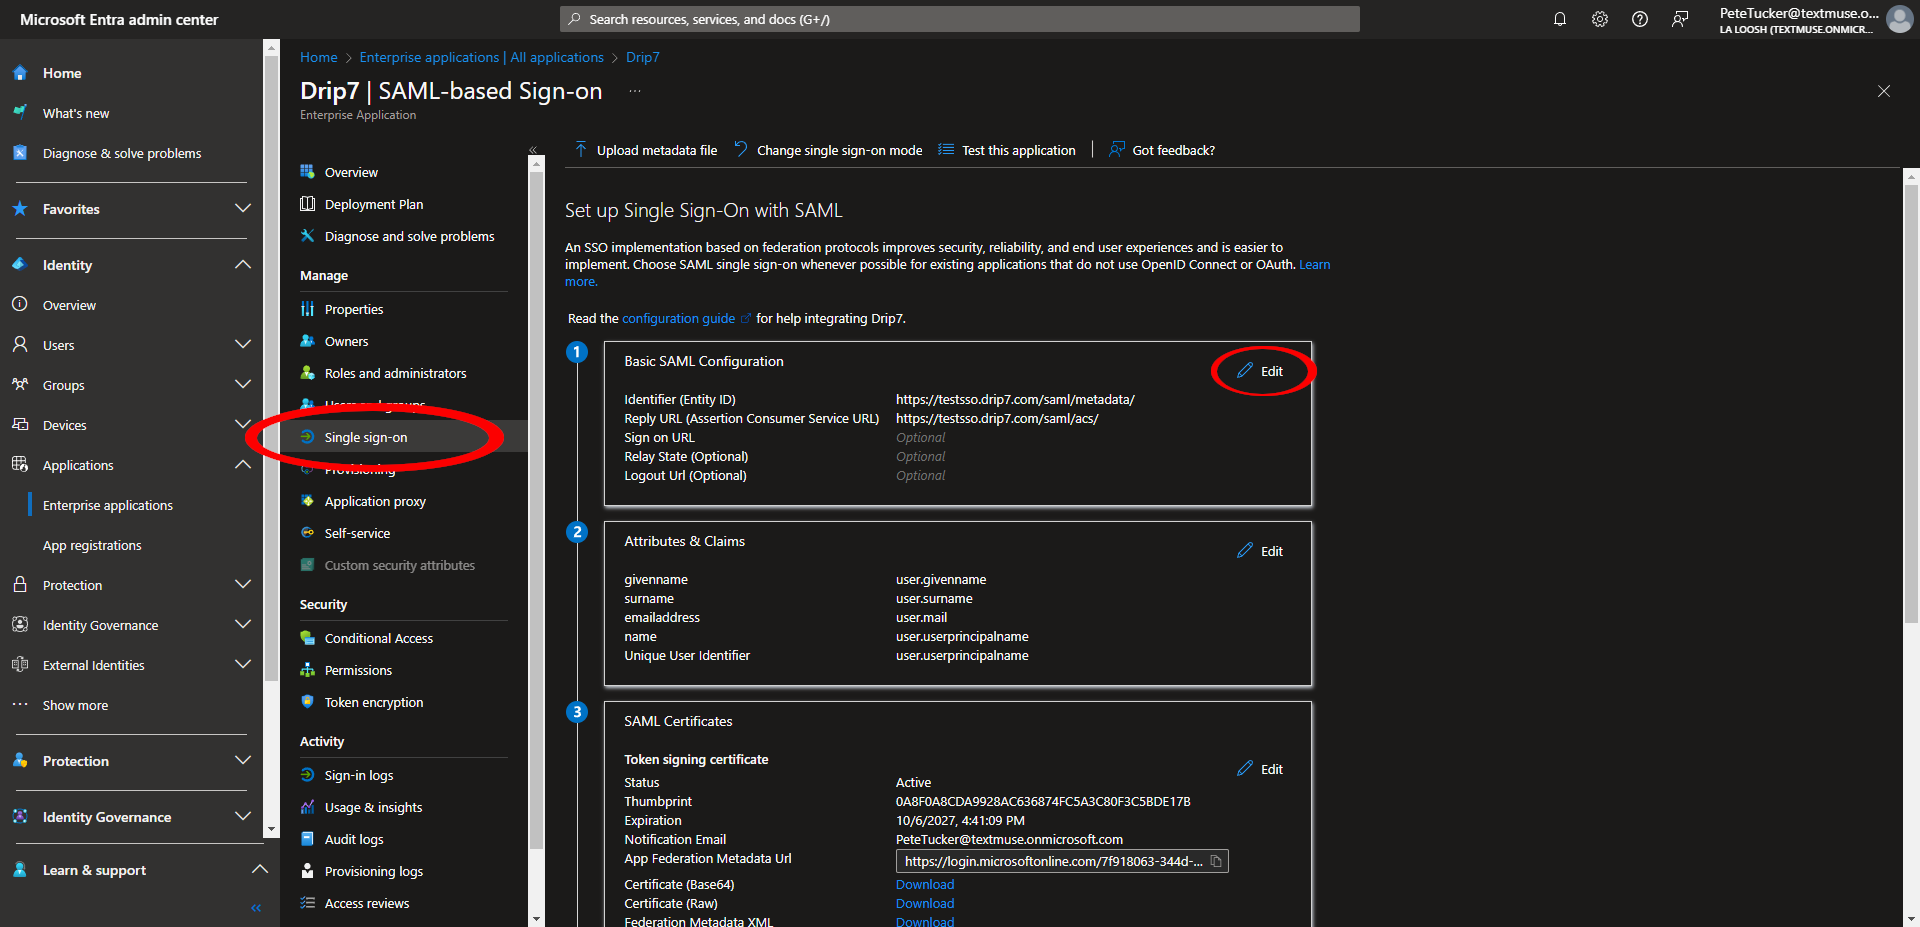
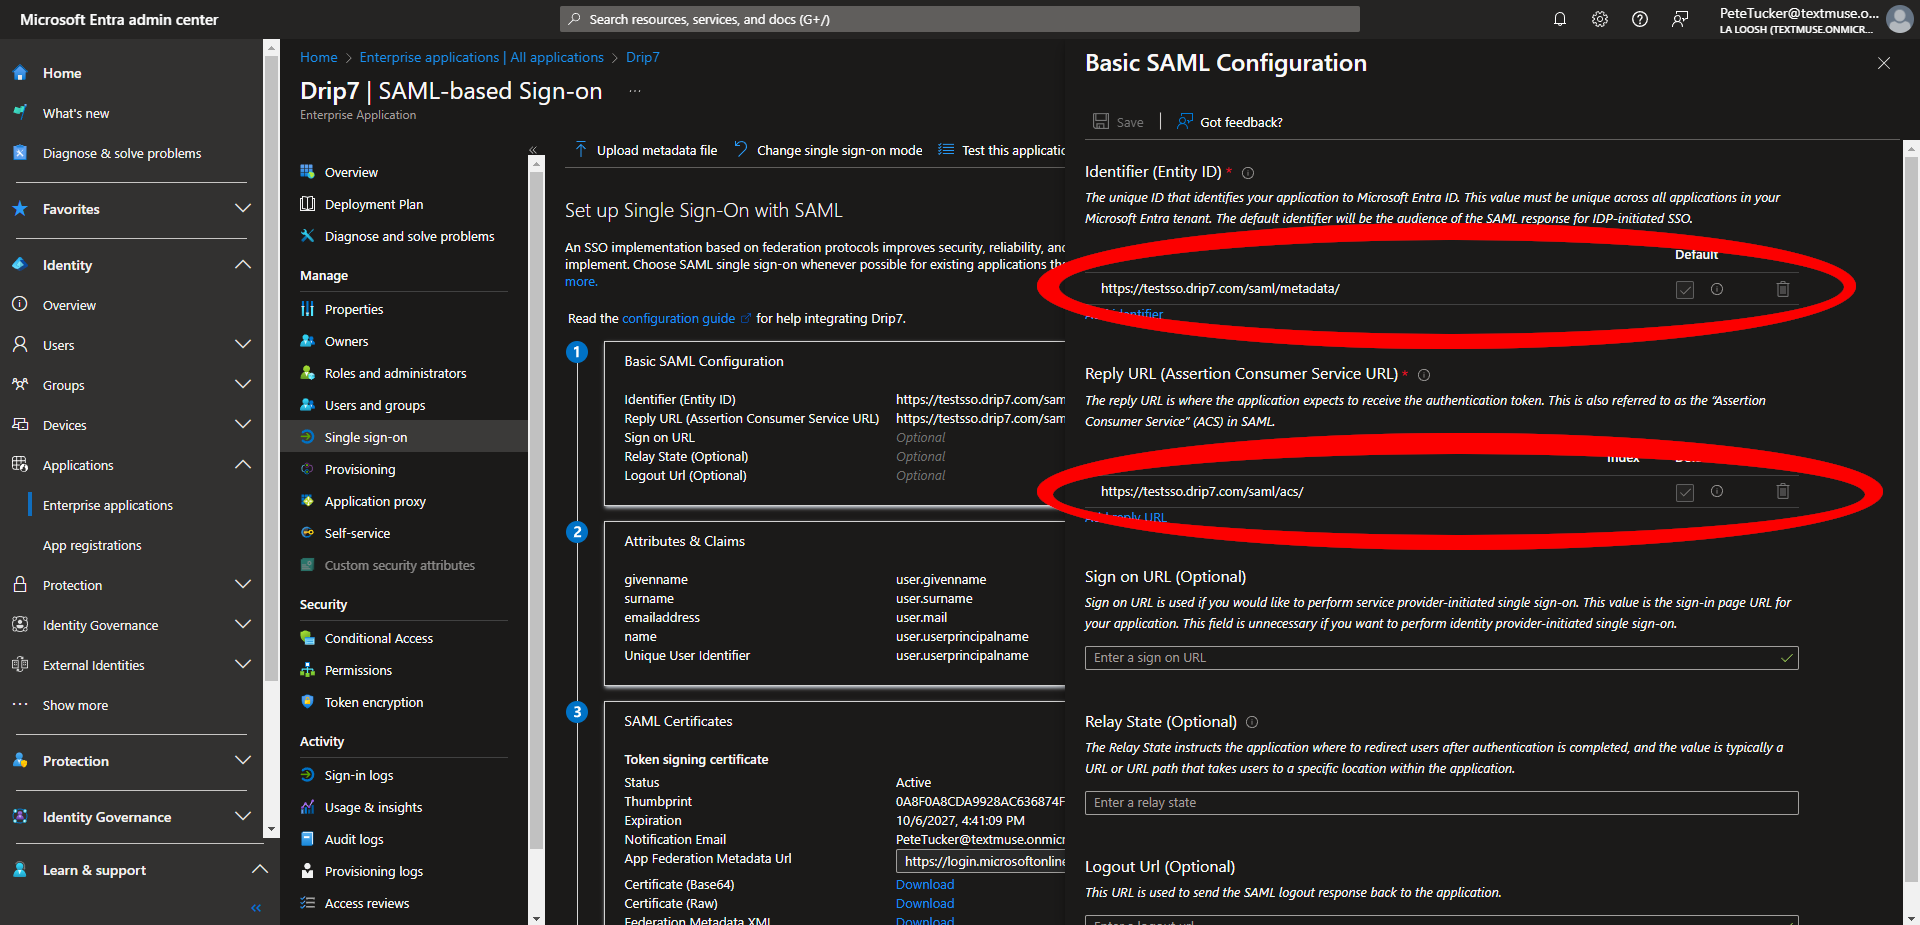
When your enterprise application is created, click on Single sign-on. On the single sign-on screen, click on the Edit button for Basic SAML Configuration.
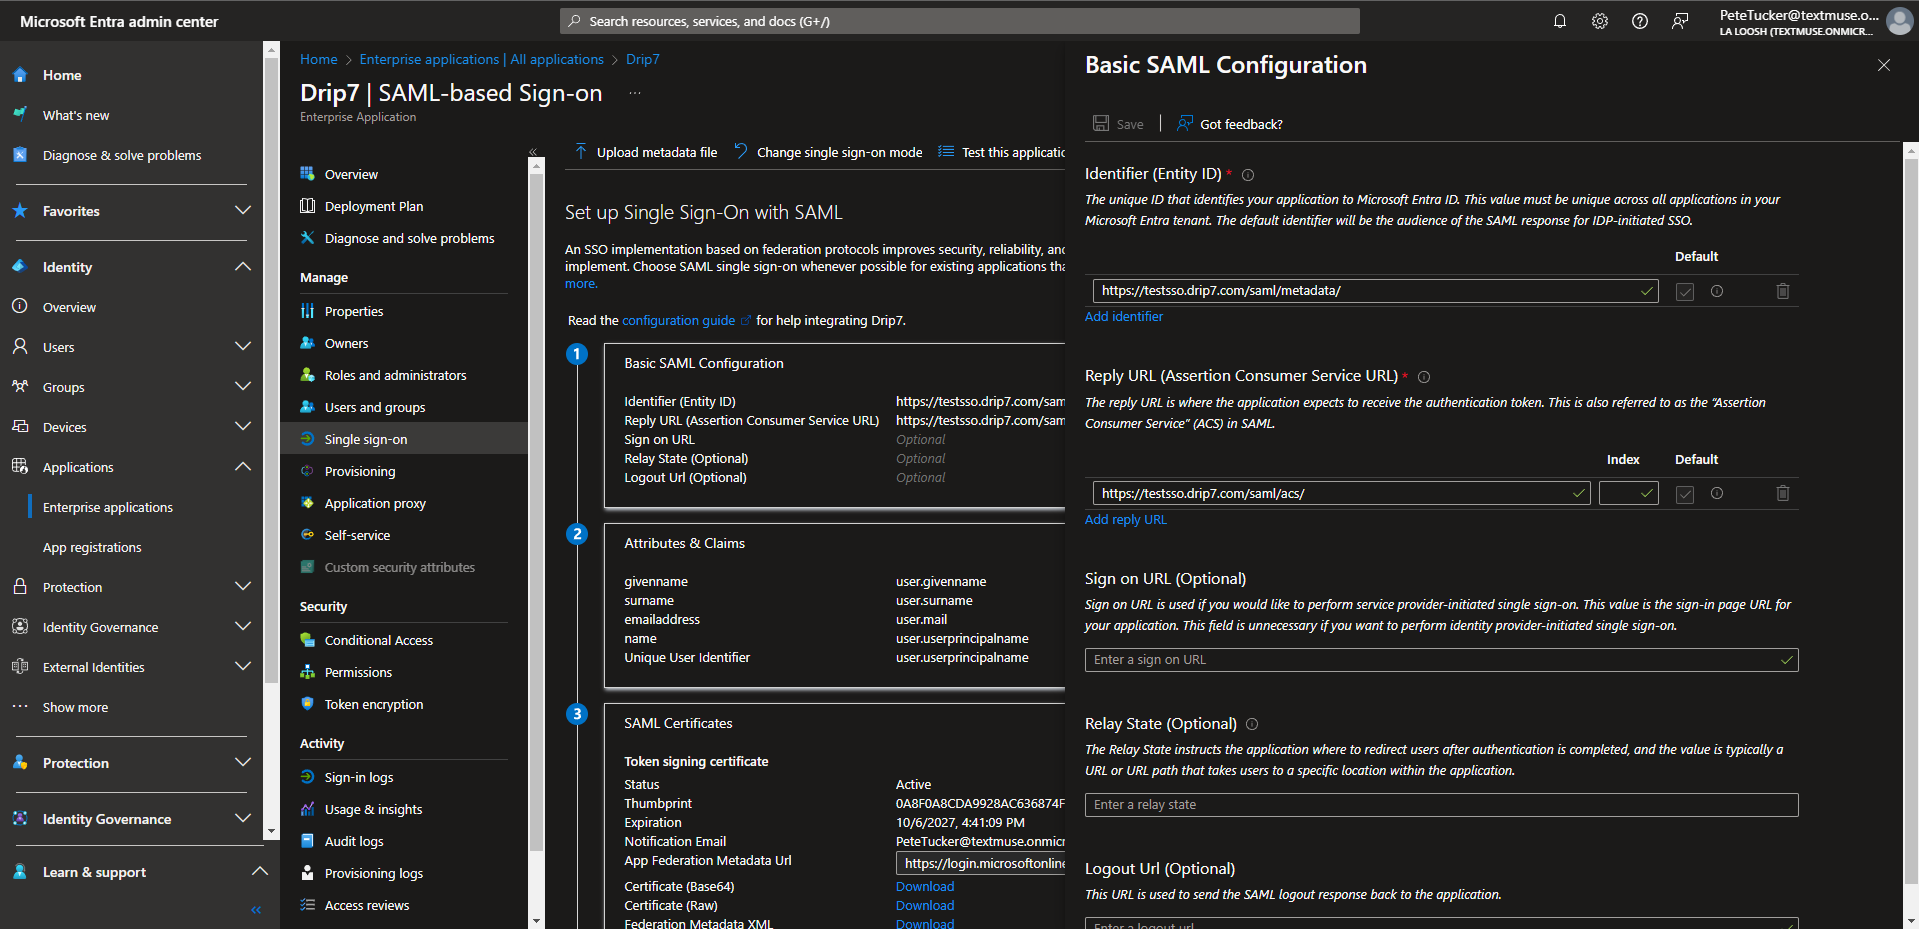
You should see a configuration pane slide in from the right:
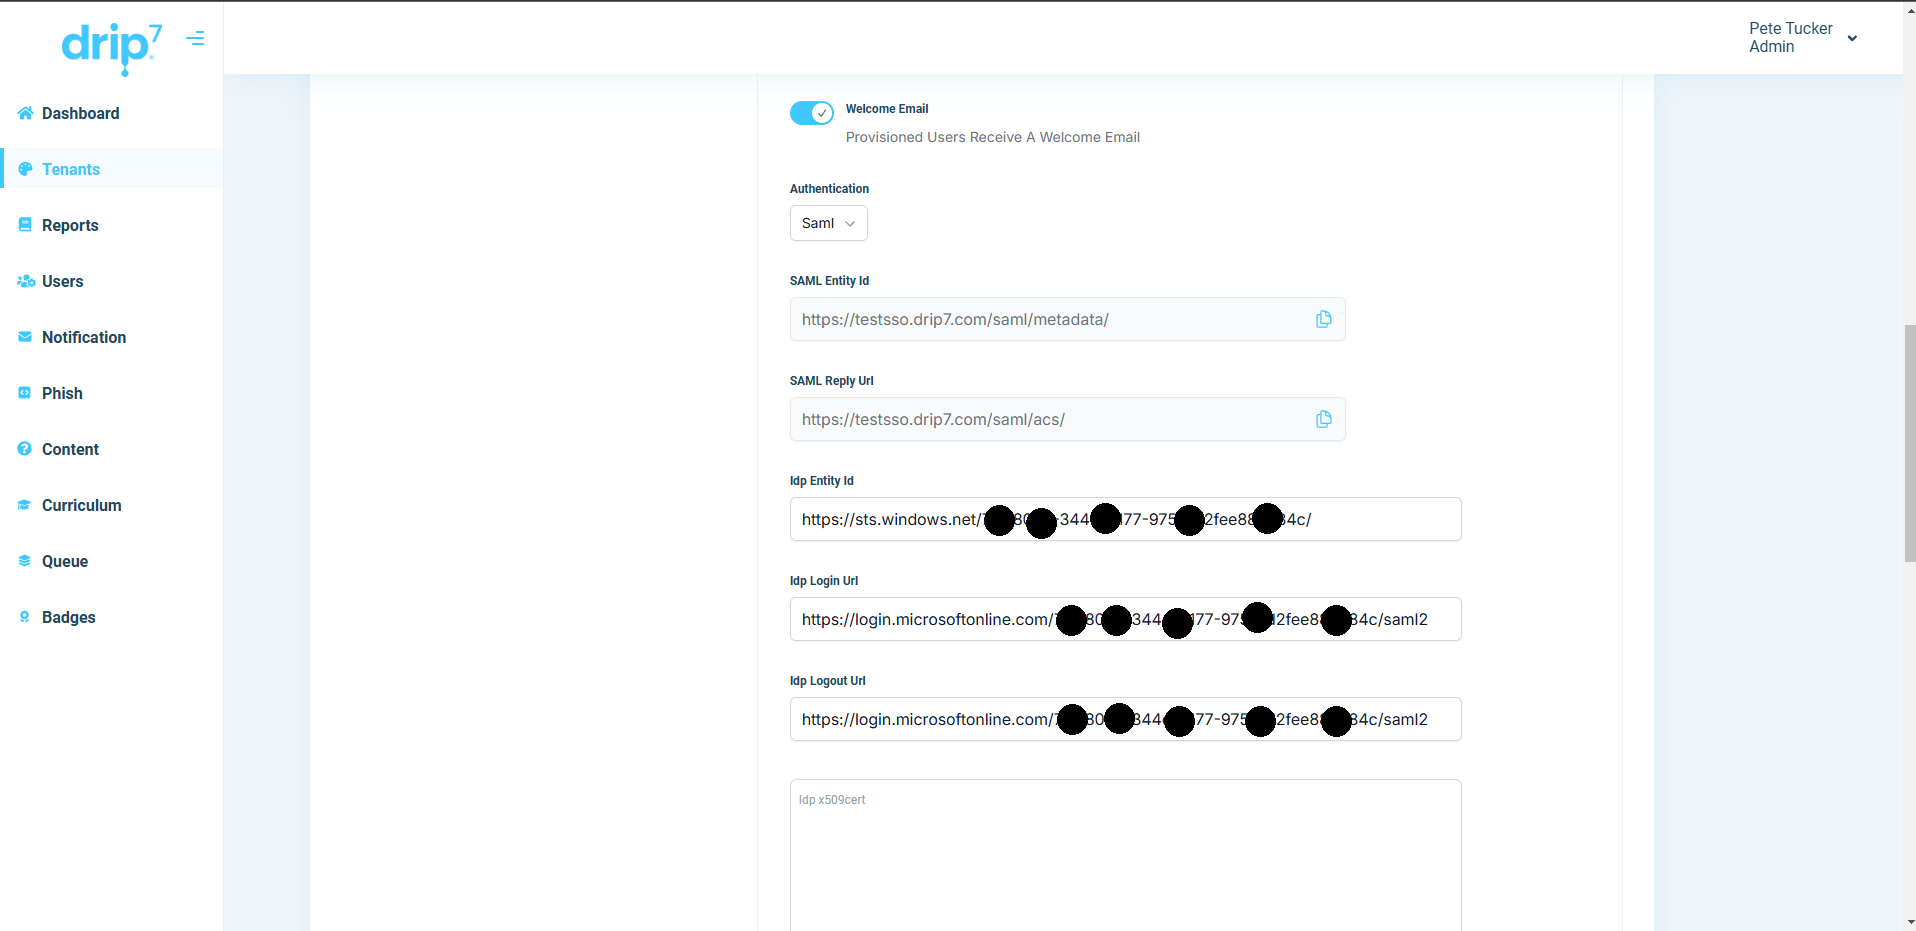
In a new tab/window, open your Drip7 Admin Dashboard, click on Tenants, then the Main Information tab at the top. Scroll down to the Authorization and Provisioning section. You’ll first need to select “Saml” from the Authentication drop-down:
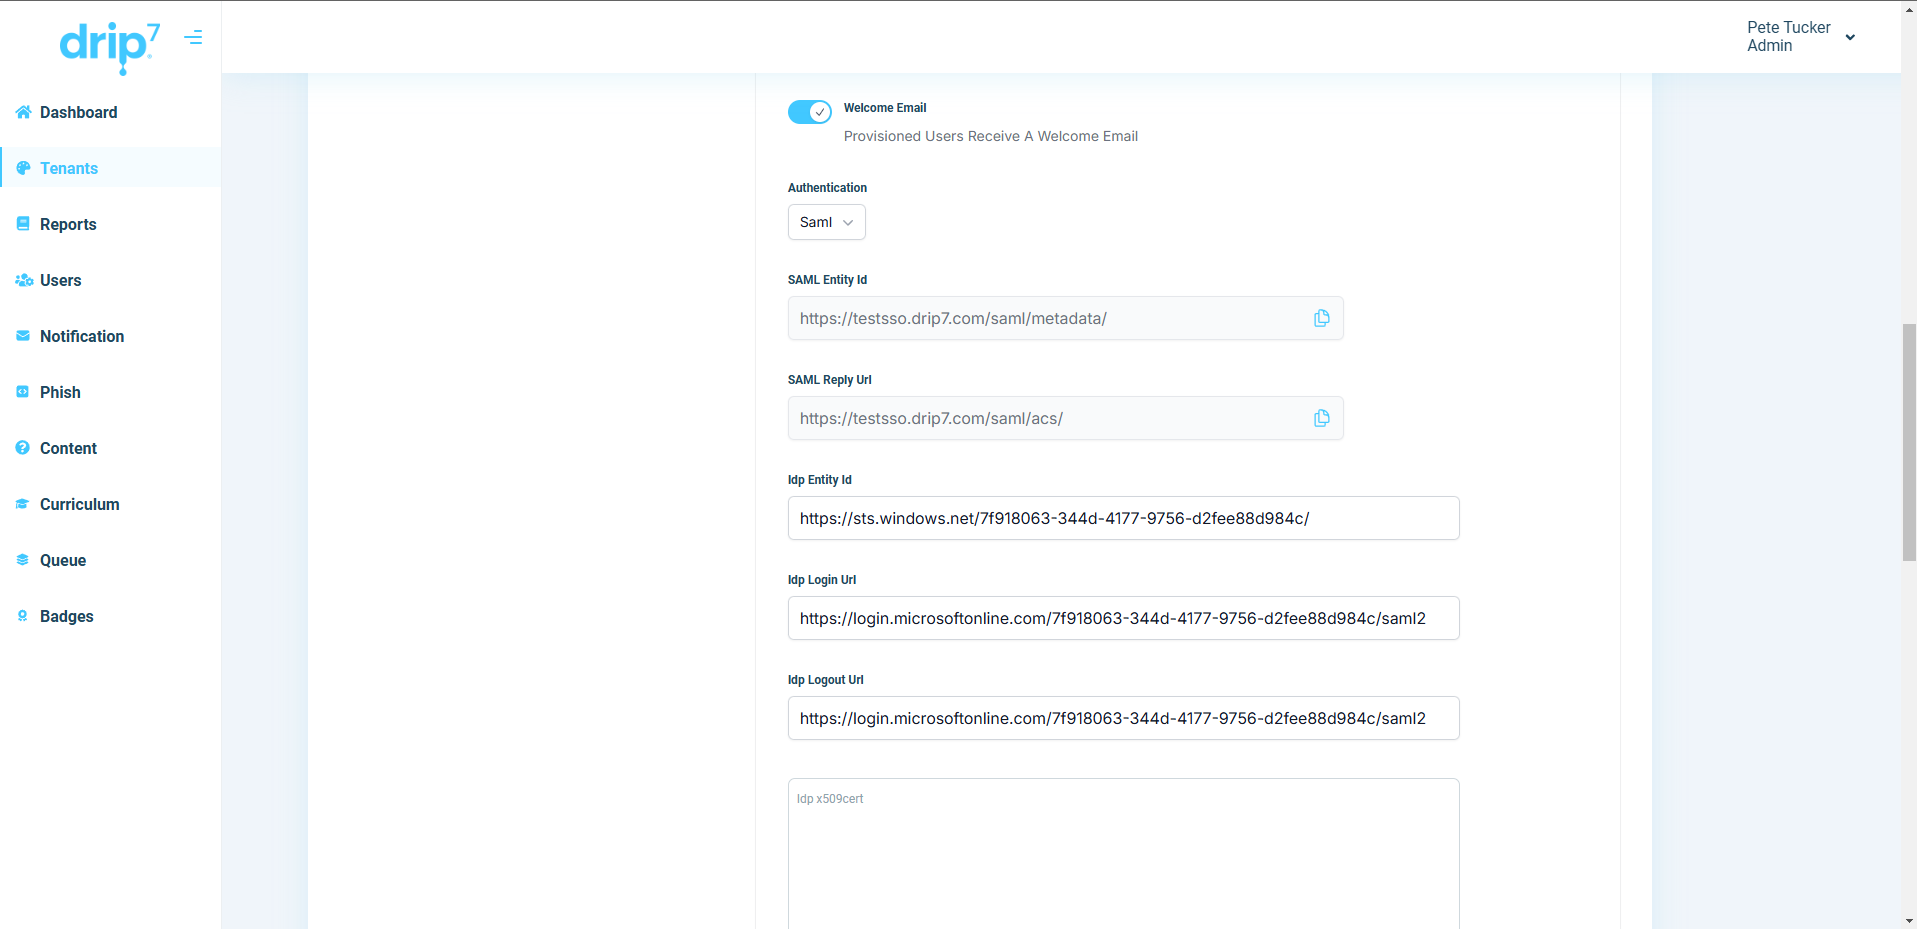
You’ll need both the SAML Entity Id and the SAML Reply Url values. Use the copy buttons to copy each to the clipboard and paste them into the corresponding Entra ID fields. Make sure to save your changes.
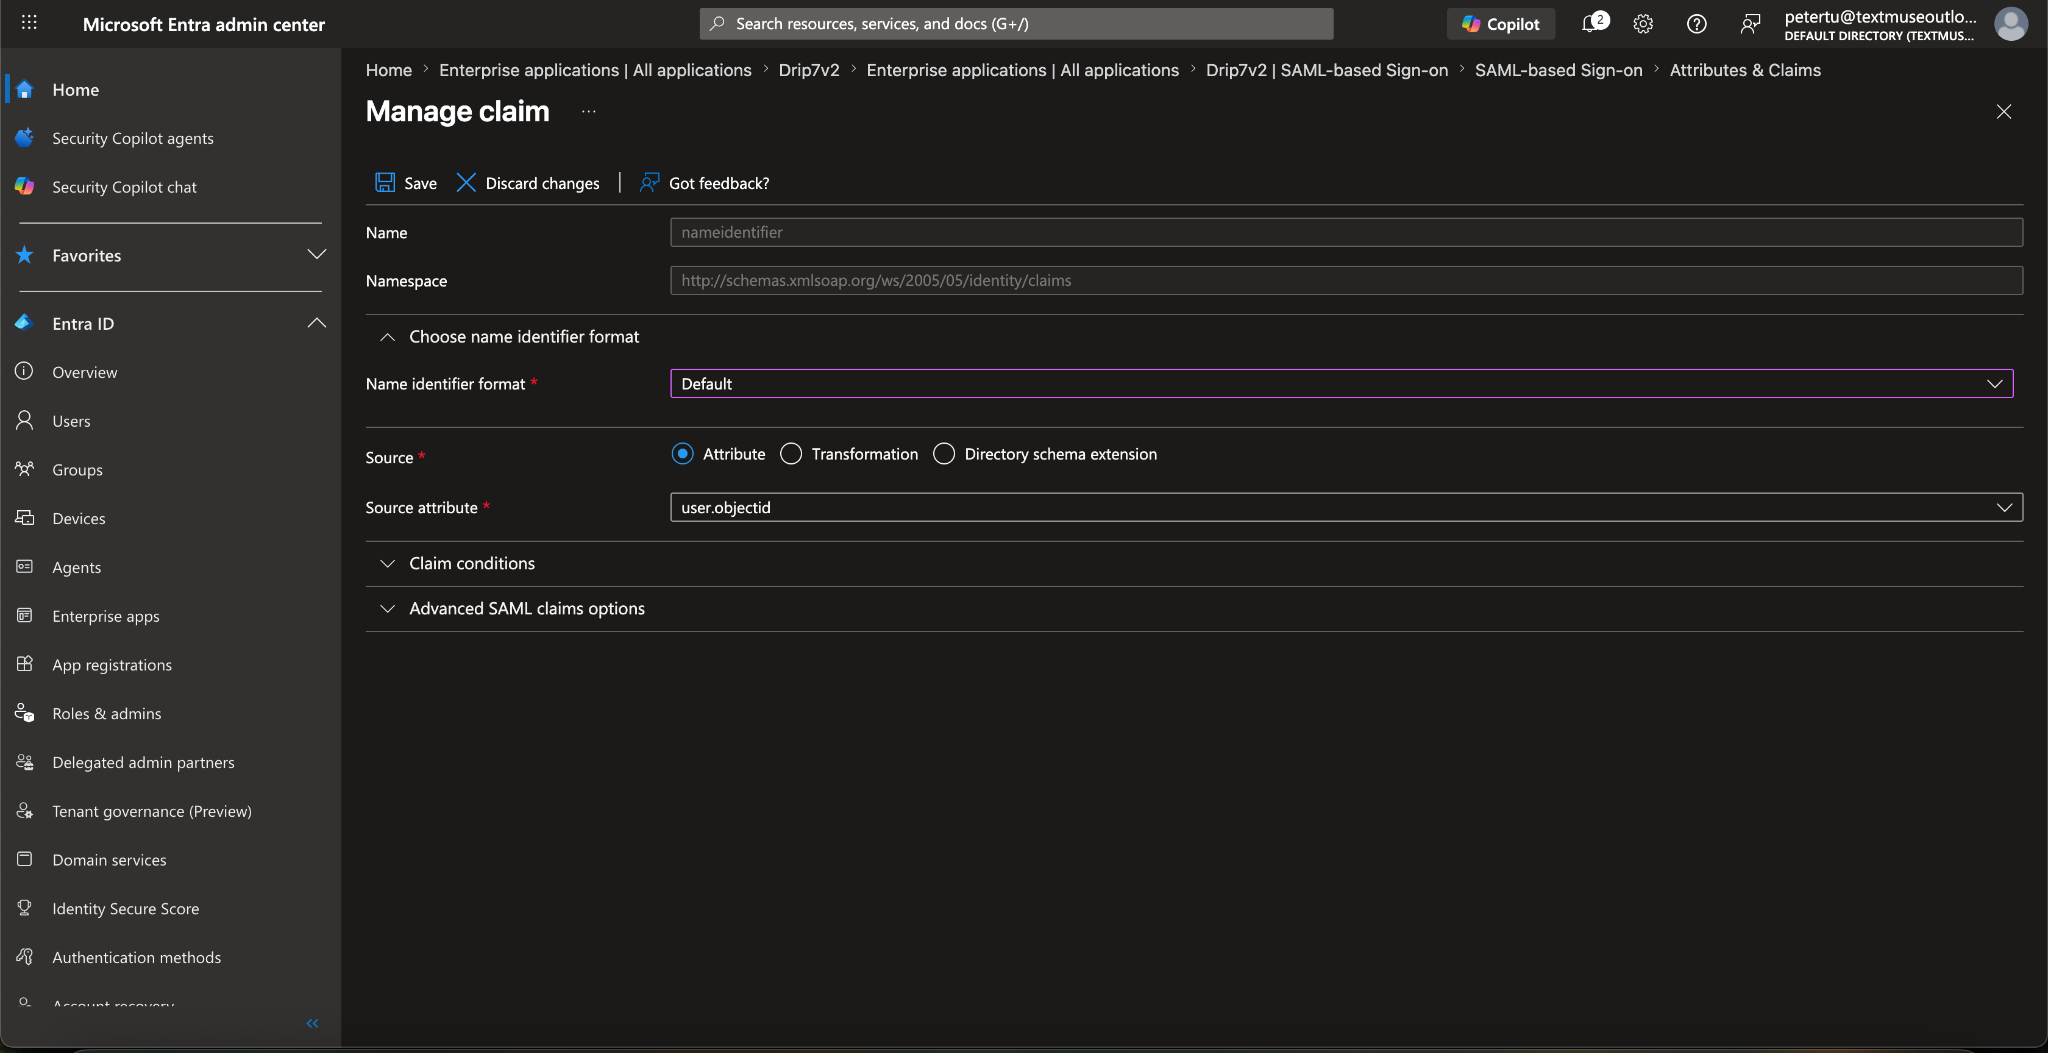
Next, you’ll need to update the Attributes & Claims so that the unique user identifier is Entra’s user.objectid and not email. Click on Edit in the Attributes and Claims box. Then click on Unique User Identifier (Name ID). In the next screen, choose “Default” for the name identifier format, and “user.objectid” for the source attribute:
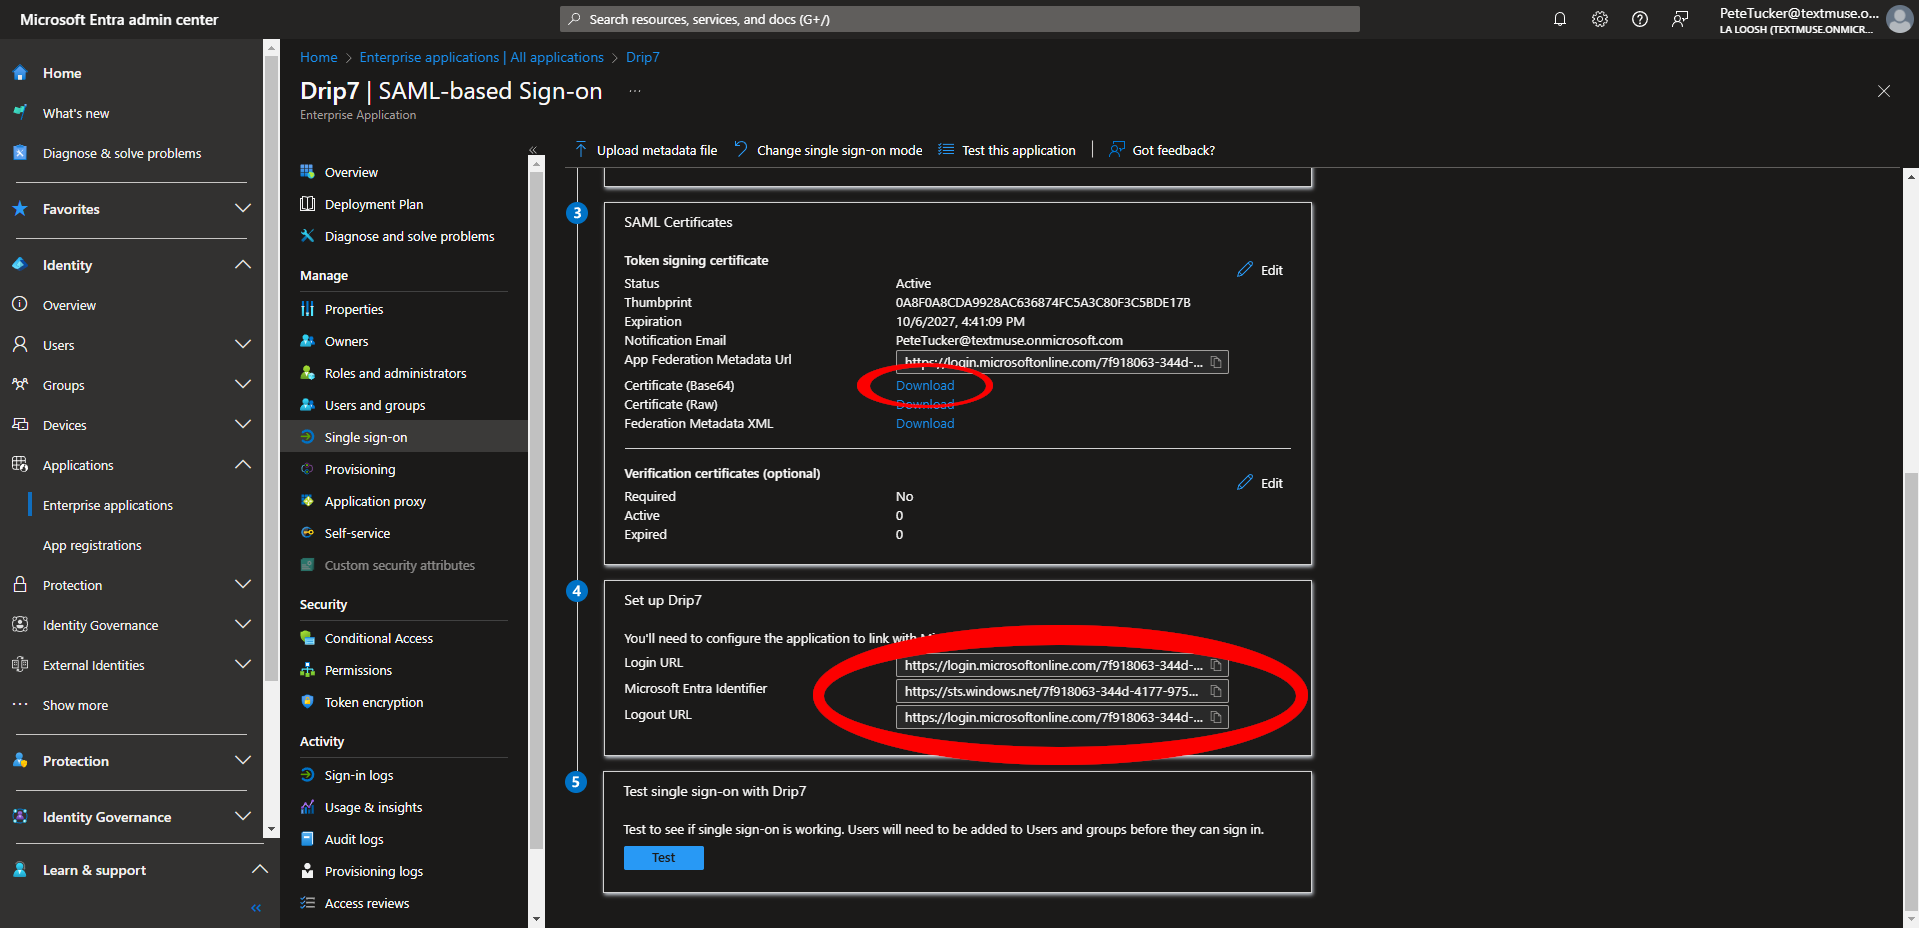
Next, you’ll need four things from Entra ID: The Certificate (base 64), the Login URL, the Microsoft Entra Identifier, and the Logout URL. Download the certificate file, and you’ll need to copy each text value in turn:
Return to the Drip7 admin page, and paste the Login URL, the Entra ID value, and the Logout value into their corresponding places. Then open your .cer certificate file in a text editor (e.g. notepad) and paste the entire contents into the Idp x509cert text field (including the BEGIN CERTIFICATE and END CERTIFICATE lines):
That’s it. Save your changes in Drip7’s admin dashboard. Users who are assigned to your application in Entra ID will now be able to log into Drip7 through your organization’s SSO workflow.
Troubleshooting
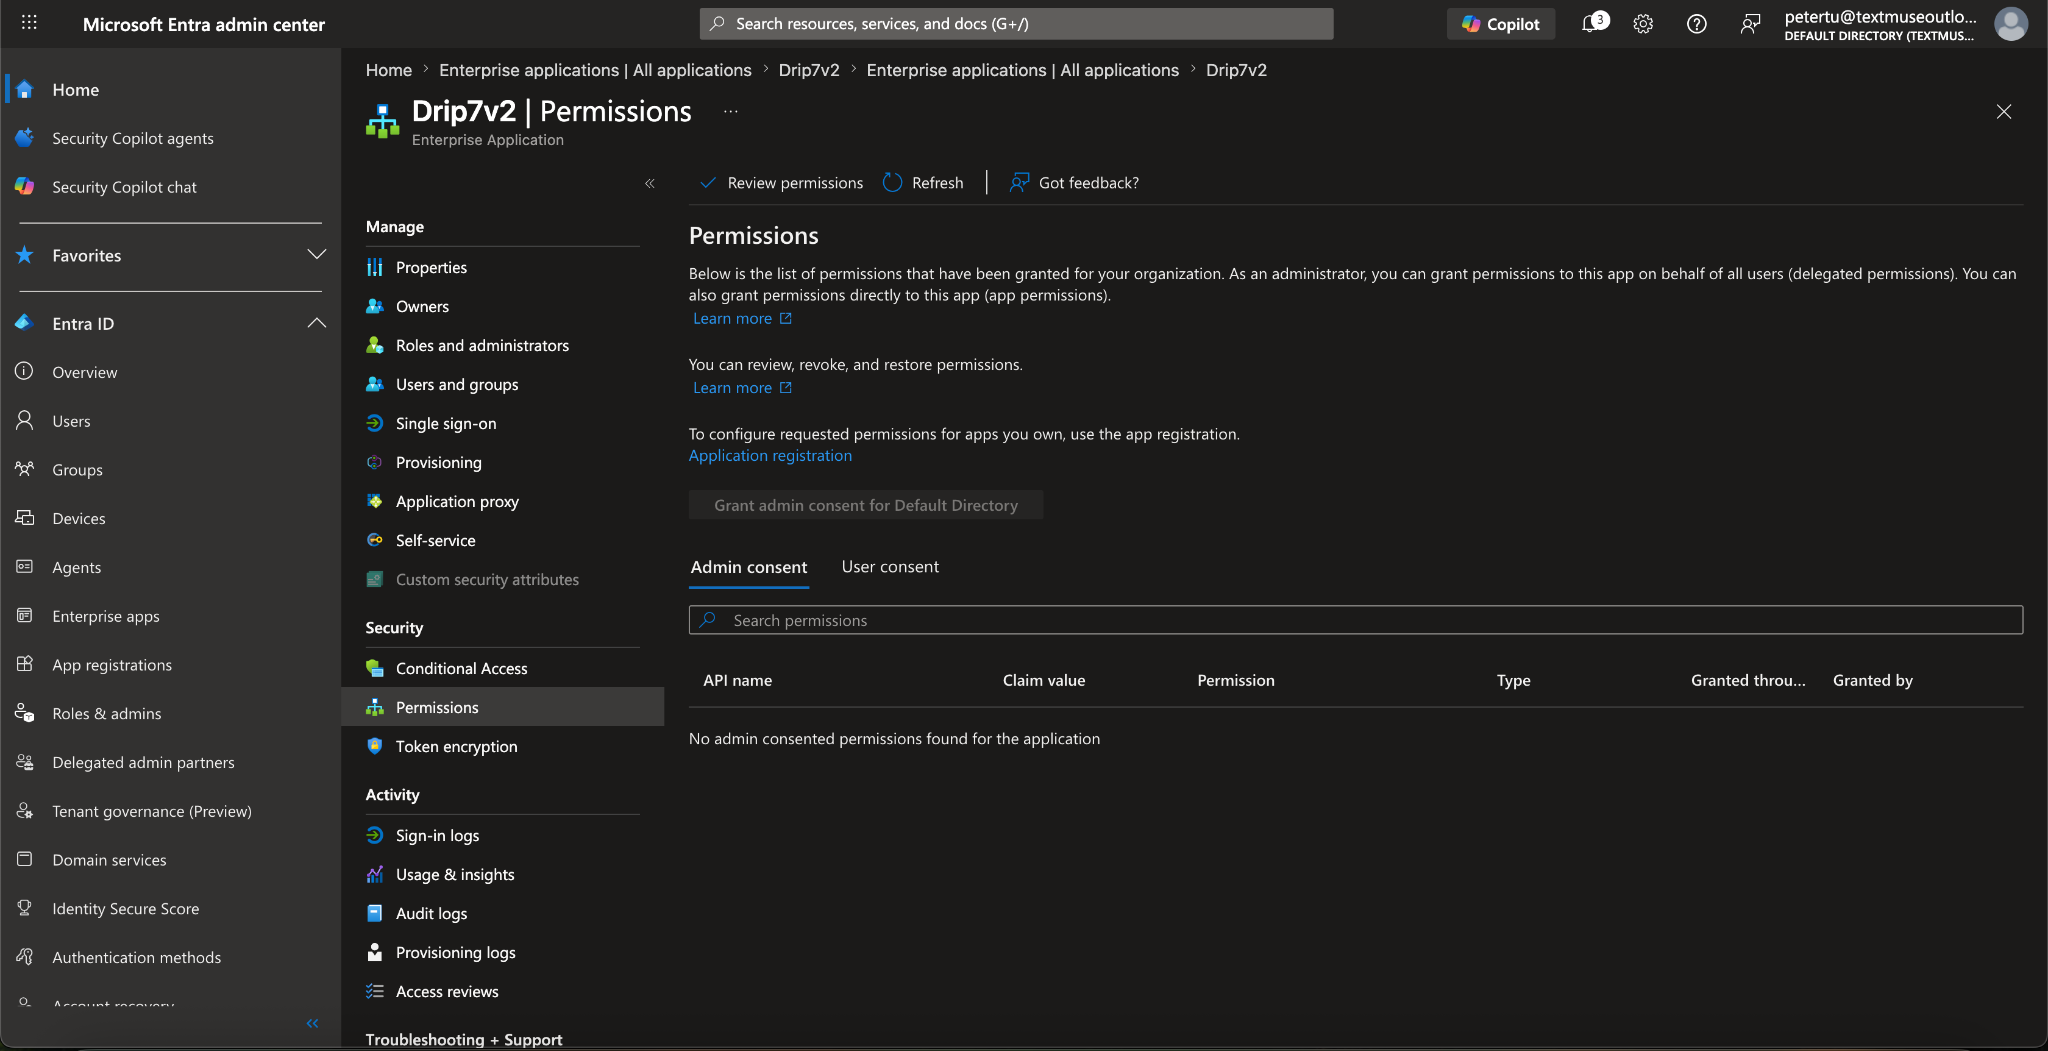
If your users gets an error saying they need admin access, check to see if your users have been added to your enterprise app registration. Also, check on the permissions. Open your enterprise app and click on “permissions”. If the Grant admin consent for Default Directory is enabled, click on it to give your users access: