This document will walk you through setting up Single Sign-On (SSO) using SAML with Google Workspace on the Drip7 Platform. The overall process is straightforward and allows your users to authenticate to Drip7 using their Google Workspace credentials.
Once configured, users assigned to the Drip7 application in Google Workspace will be able to authenticate using their organization's Google Workspace Single Sign-On experience. Optionally, tenant admins have the ability to turn on Automatic User Enrollment upon the user’s first login. This will add them to the database if they weren’t already enrolled.
Requires Super Admin or delegated administrator permissions within your Google Workspace organization.
Log in to the Google Admin Console by visiting:
From the Admin Console, navigate to:
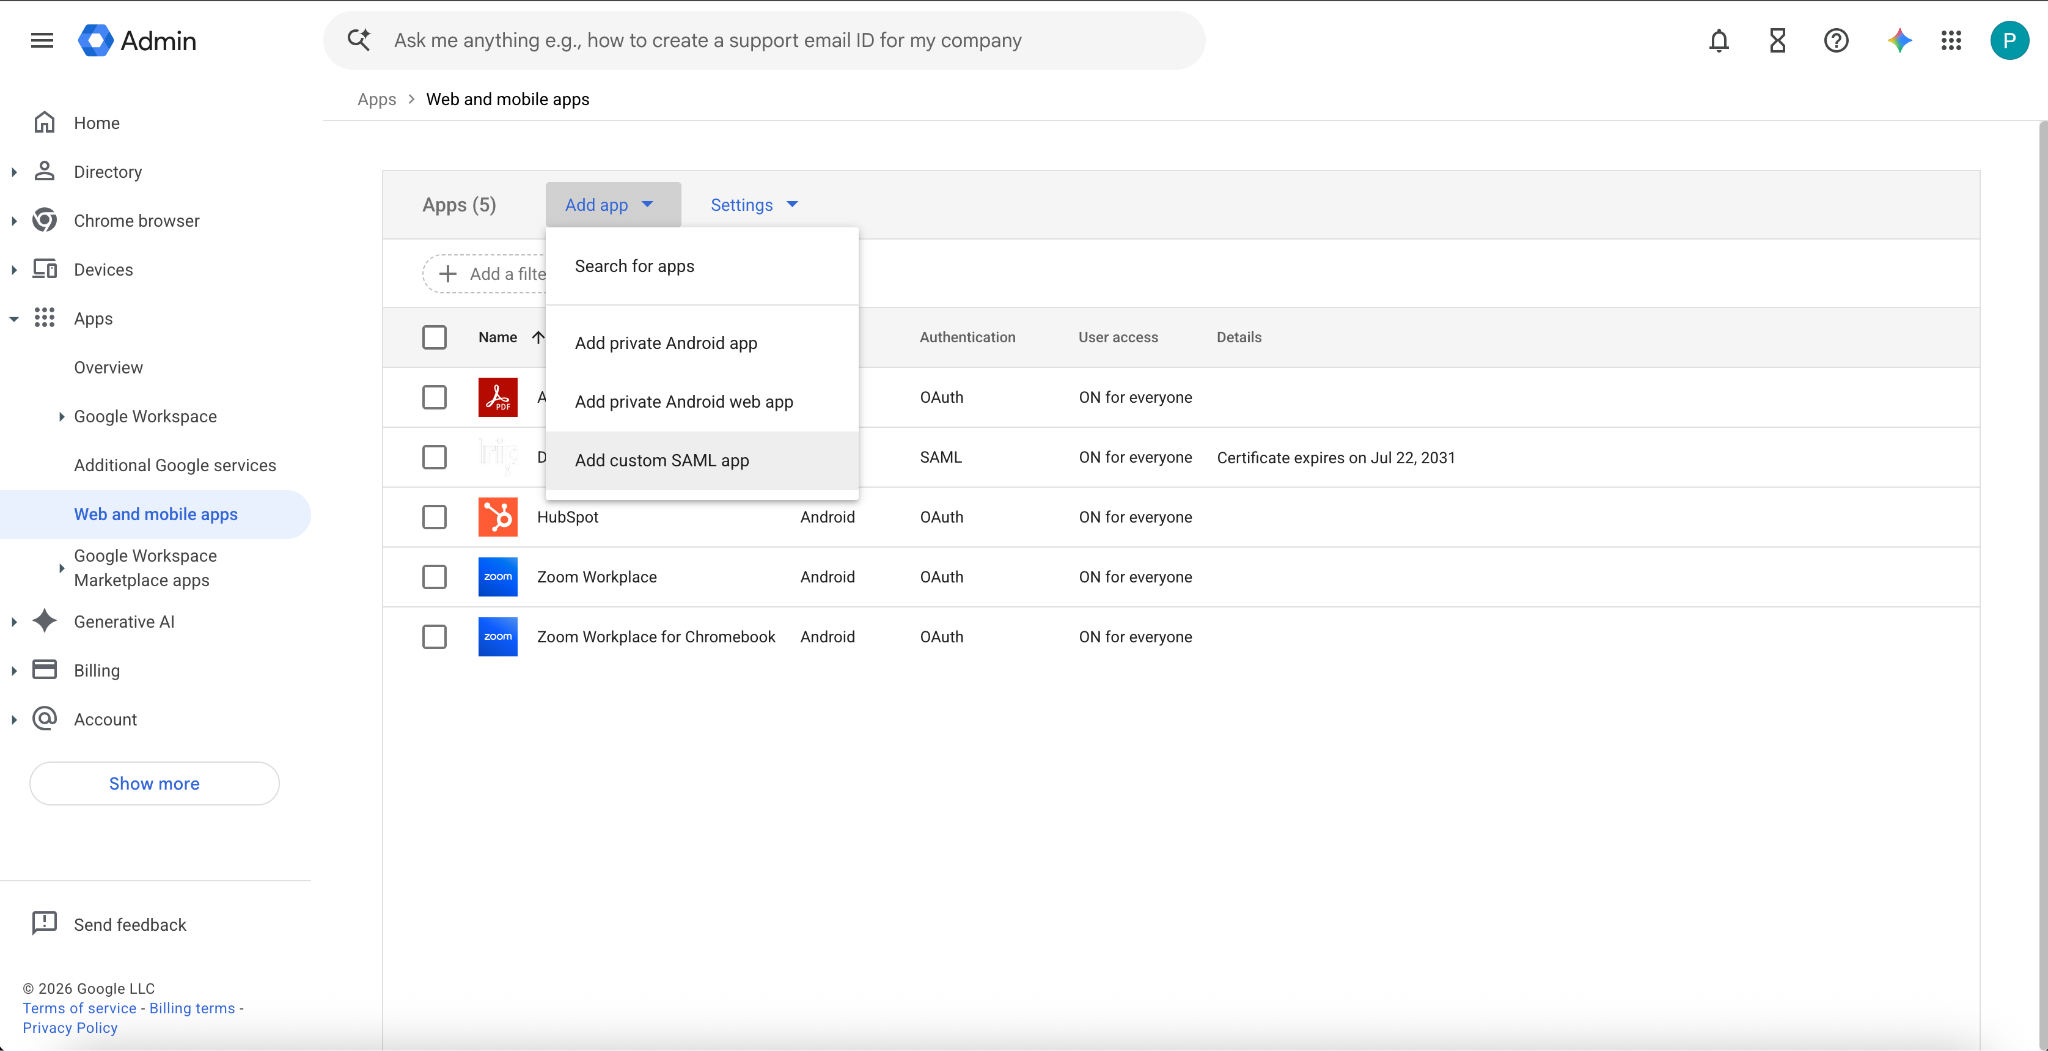
Apps → Web and mobile apps
Click Add App, then select Add custom SAML app.
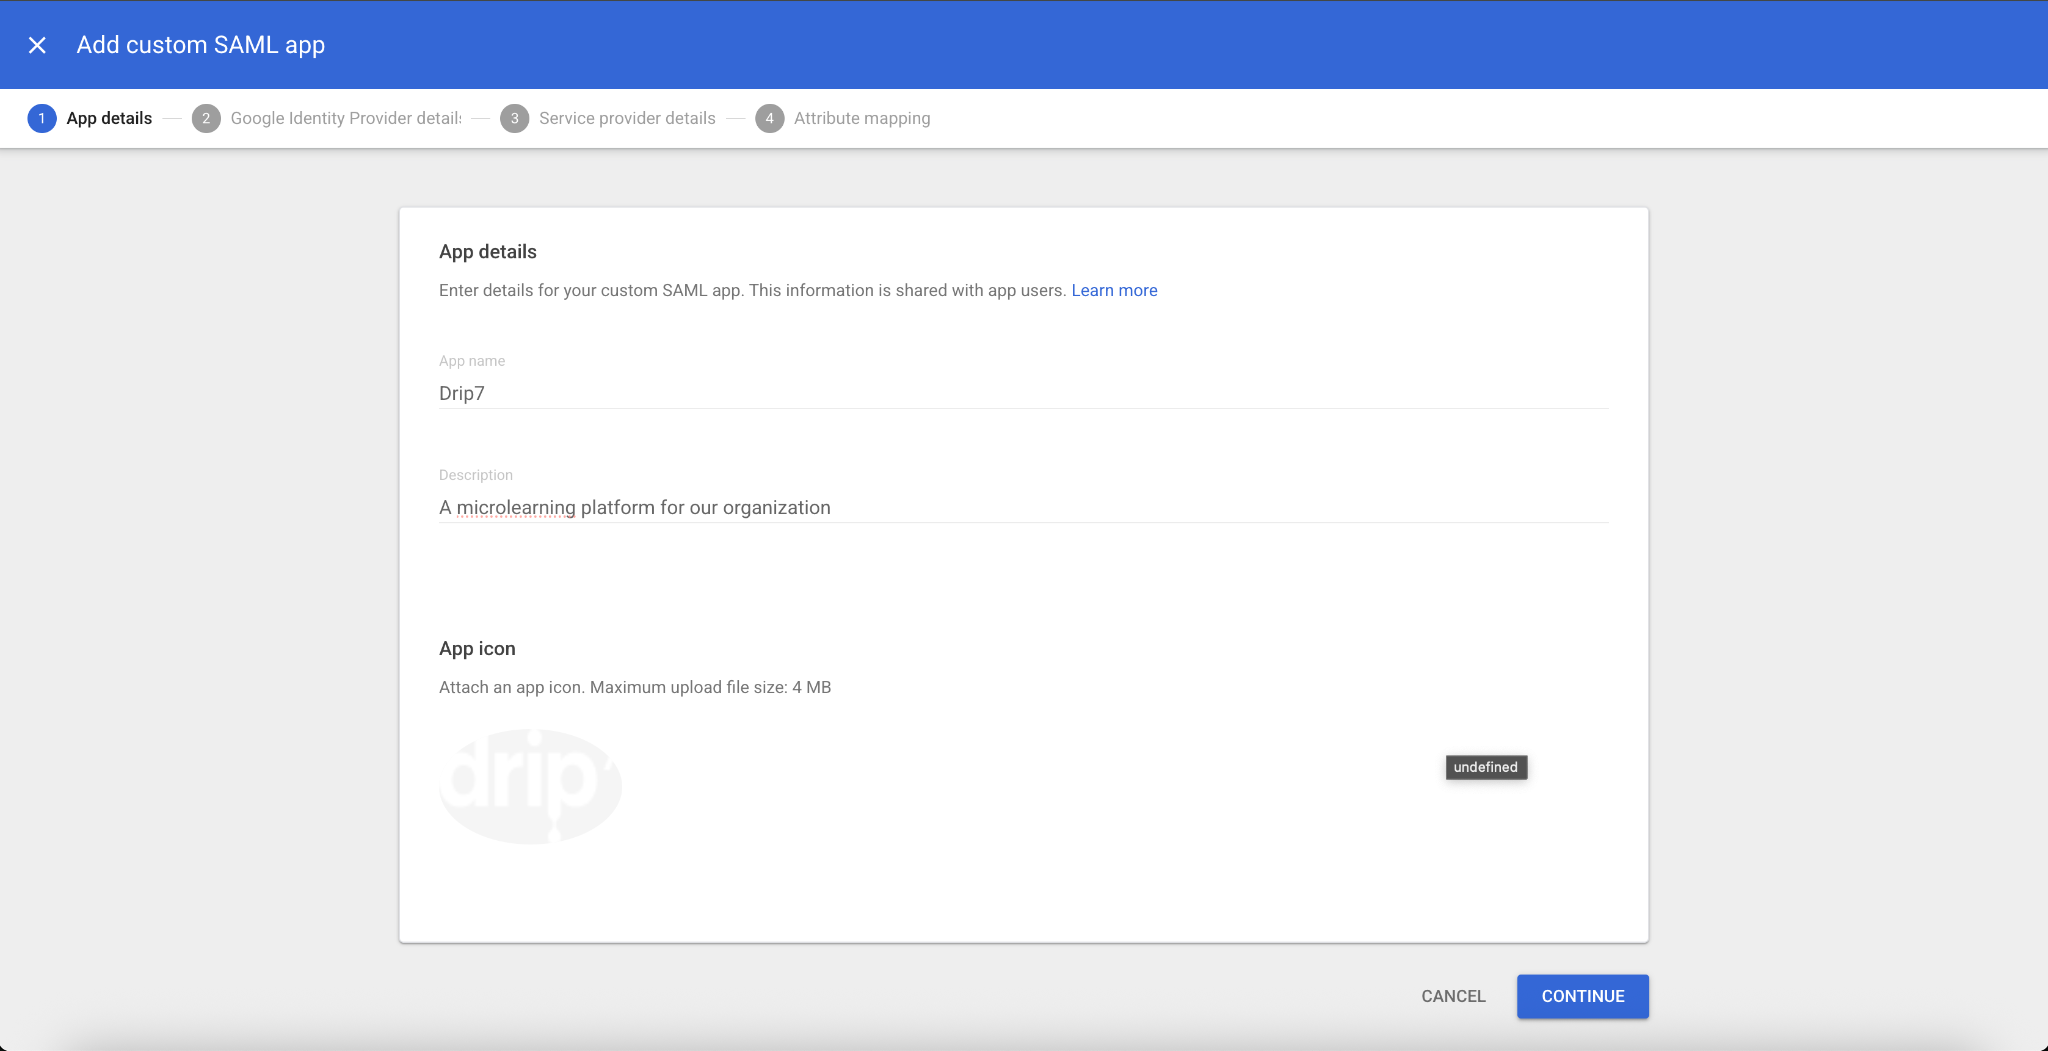
Give the application a recognizable name, such as:
Drip7
(Optional) Upload the Drip7 logo to make the application easier for administrators and users to identify.
Click Continue.
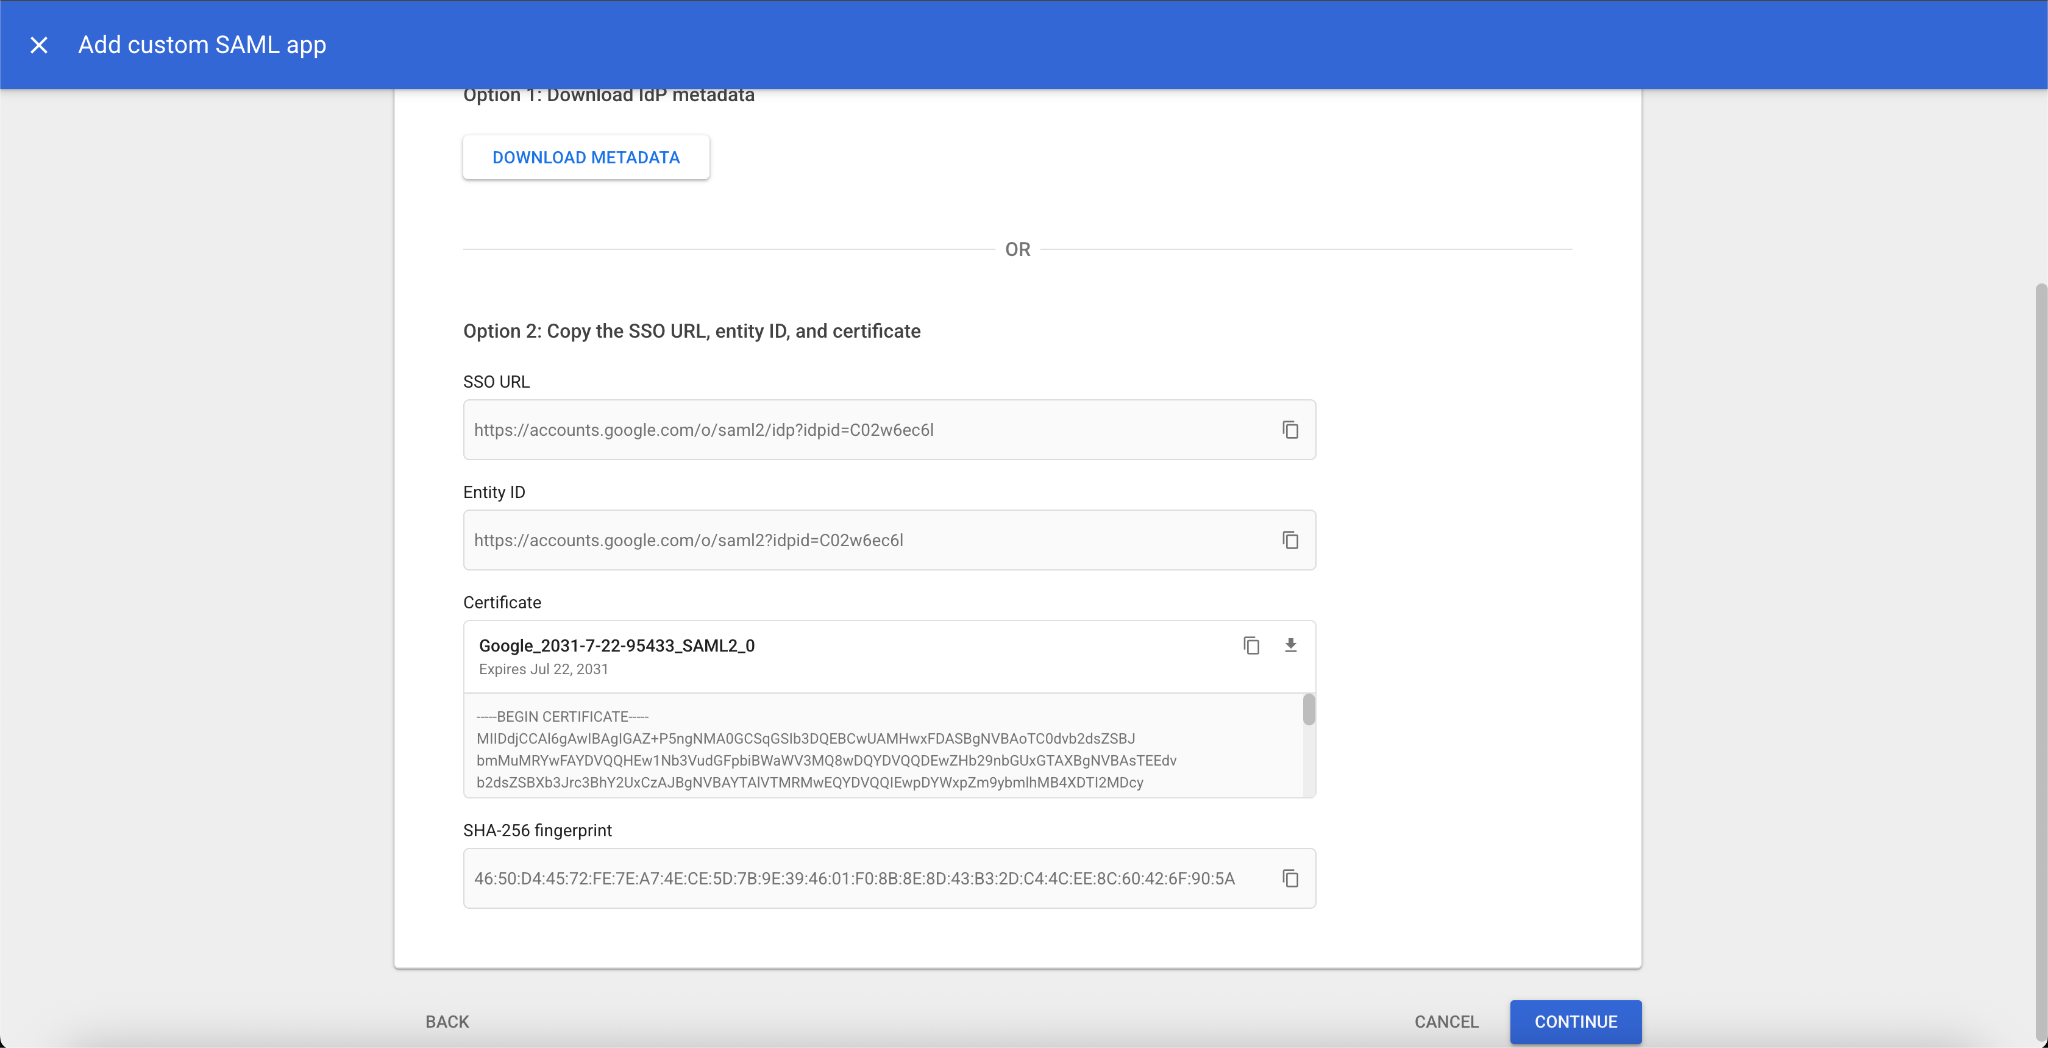
Google will display the Identity Provider (IdP) information required by Drip7.
You will need the following values:
Download the X.509 certificate, or copy the certificate directly if presented.
Option 1: Leave this browser tab open.
Option 2: Download the metadata for later use.
Open a new browser tab and sign in to your Drip7 Admin Dashboard.
Navigate to:
Tenants → Main Information
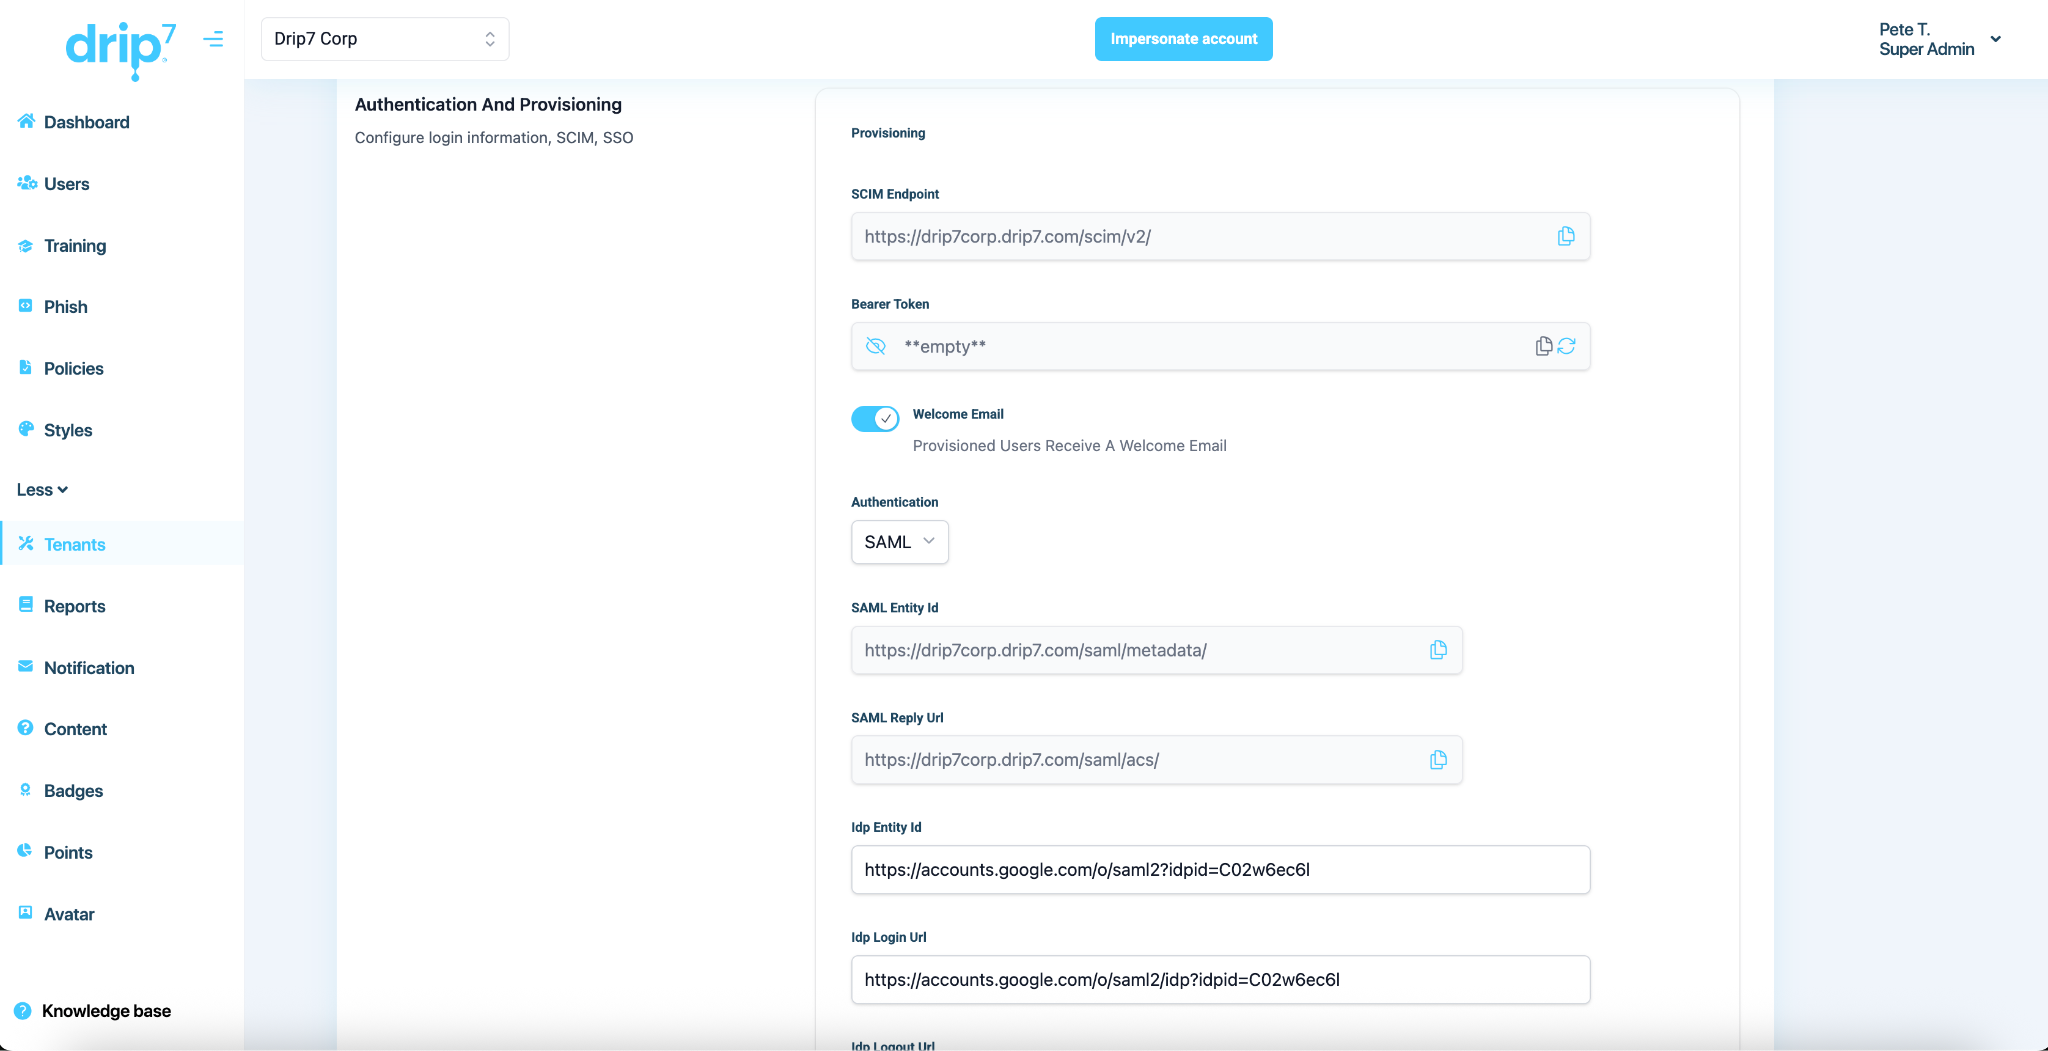
Scroll down to the Authorization and Provisioning section.
From the Authentication drop-down, select:
SAML
Drip7 will display two values that you'll need for Google Workspace:
Use the copy buttons to copy each value.
Return to the Google Admin Console.
Paste the Drip7 values into the corresponding Google fields:
Google Workspace Field
Drip7 Value
ACS URL
SAML Reply URL
Entity ID
SAML Entity ID
Start URL (optional)
Leave blank or use your Drip7 login URL if desired
Name ID Format
Name ID
Primary Email
Click Continue.

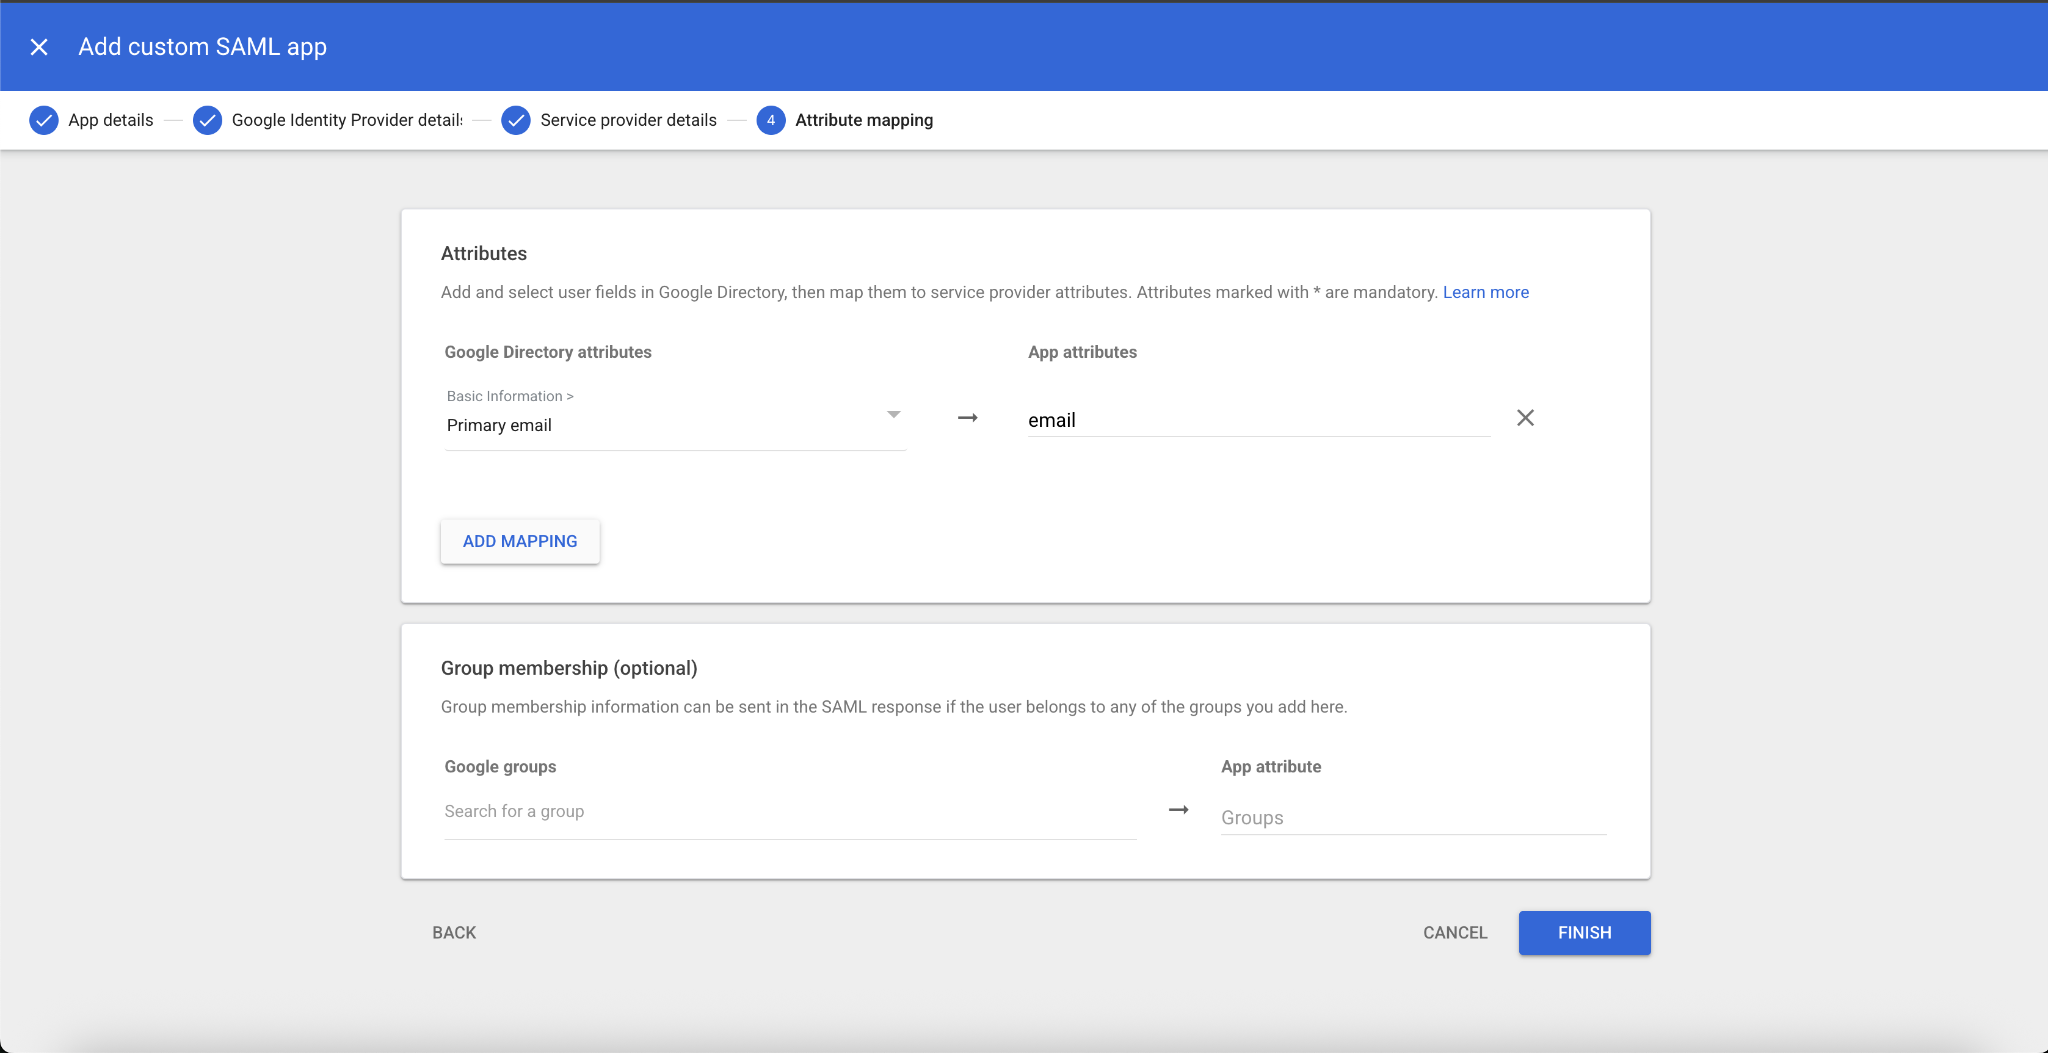
On the Attribute Mapping page, add the following mapping:
Google Directory Attribute
App Attribute
Primary Email
If your organization requires additional attributes, they may also be mapped as needed.
Click Finish.
Return to your Drip7 Admin Dashboard.
Populate the following fields using the information from Google Workspace:
Drip7 Field
Google Workspace Value
Identity Provider Single Sign-On URL
SSO URL
Identity Provider Entity ID
Entity ID
IdP X509 Certificate
Entire X.509 Certificate
If using the downloaded certificate, open the file in a text editor (such as Notepad or TextEdit) and copy the entire contents, including:
-----BEGIN CERTIFICATE-----
...
-----END CERTIFICATE-----
Paste the complete certificate into the IdP X509 Certificate field within Drip7.
Save your changes.
Return to the Google Admin Console.
Open the Drip7 application you created.
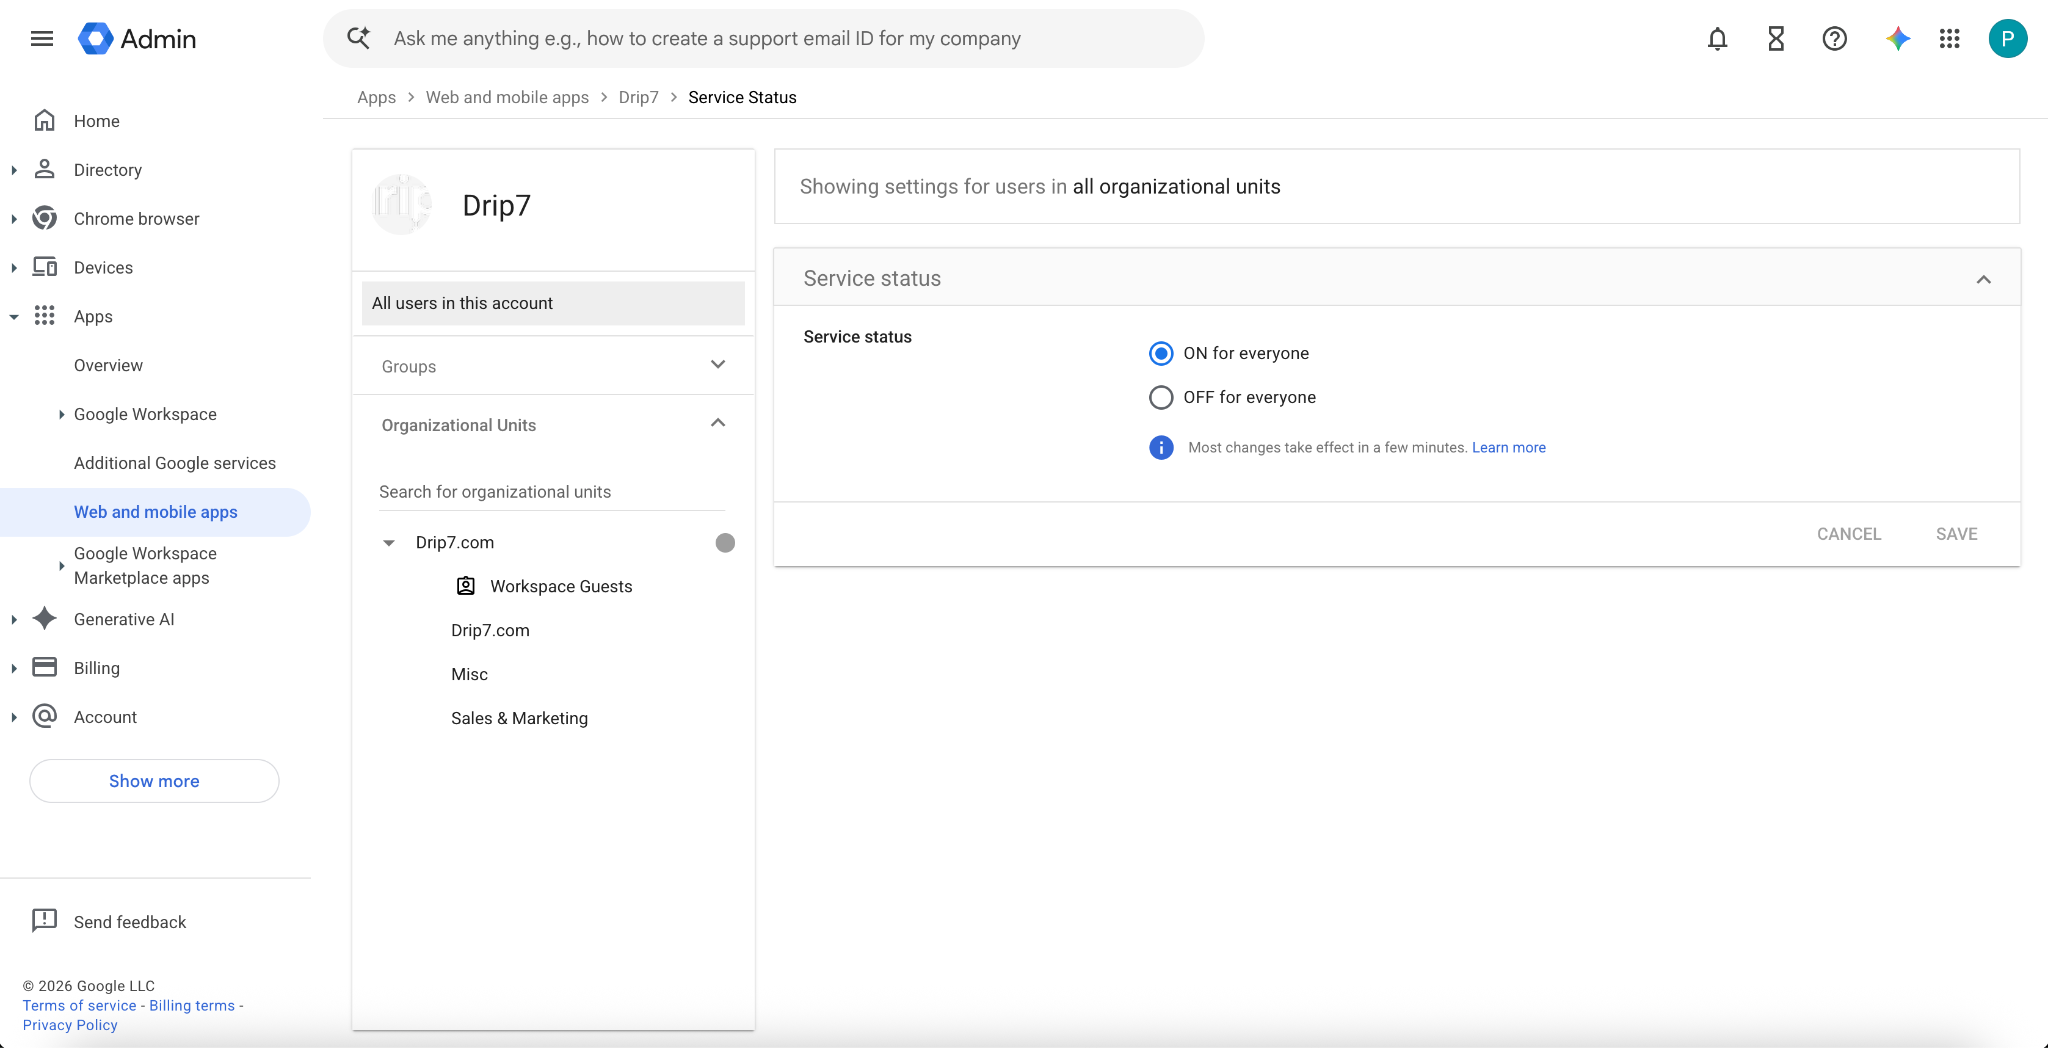
Click User Access.
Choose:
Save your changes.
Sign in using a Google Workspace user who has access to the Drip7 application.
You should be redirected through your organization's Google authentication page and automatically signed into Drip7.
If authentication is successful, your SAML configuration is complete.
Note: Sometimes it takes Google a couple of minutes for all changes to go through, so this might take some patience.
If authentication fails, verify the following: